Connect ChatGPT step by step
This page walks through connecting the free ChatGPT web version (chatgpt.com) to your UHT account, screenshot by screenshot. Every red marker in the pictures is referenced in the text, so you always know exactly which button to press. The whole thing takes about two minutes, and you only do it once.
You need a ChatGPT account (the free tier is enough) and a UHT account. The only thing worth copying before you start is the server address:
https://ultimate-holdem-timer.com/mcp
Step 1 — Open the ChatGPT settings
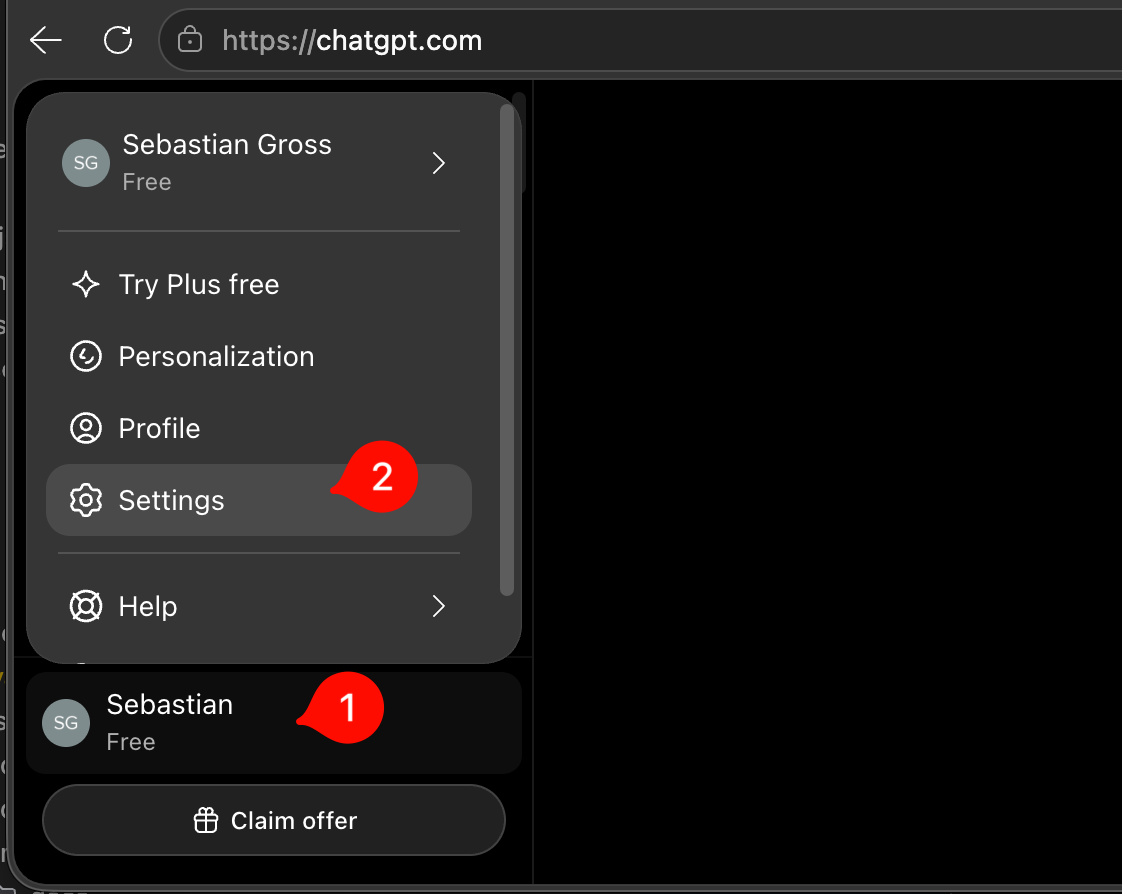
On chatgpt.com, click your account name at the bottom of the left sidebar (1). In the menu that opens, choose Settings (2).
Step 2 — Go to the plugins section
In the settings dialog, select Plugins in the left column (1), then click Browse plugins (2).
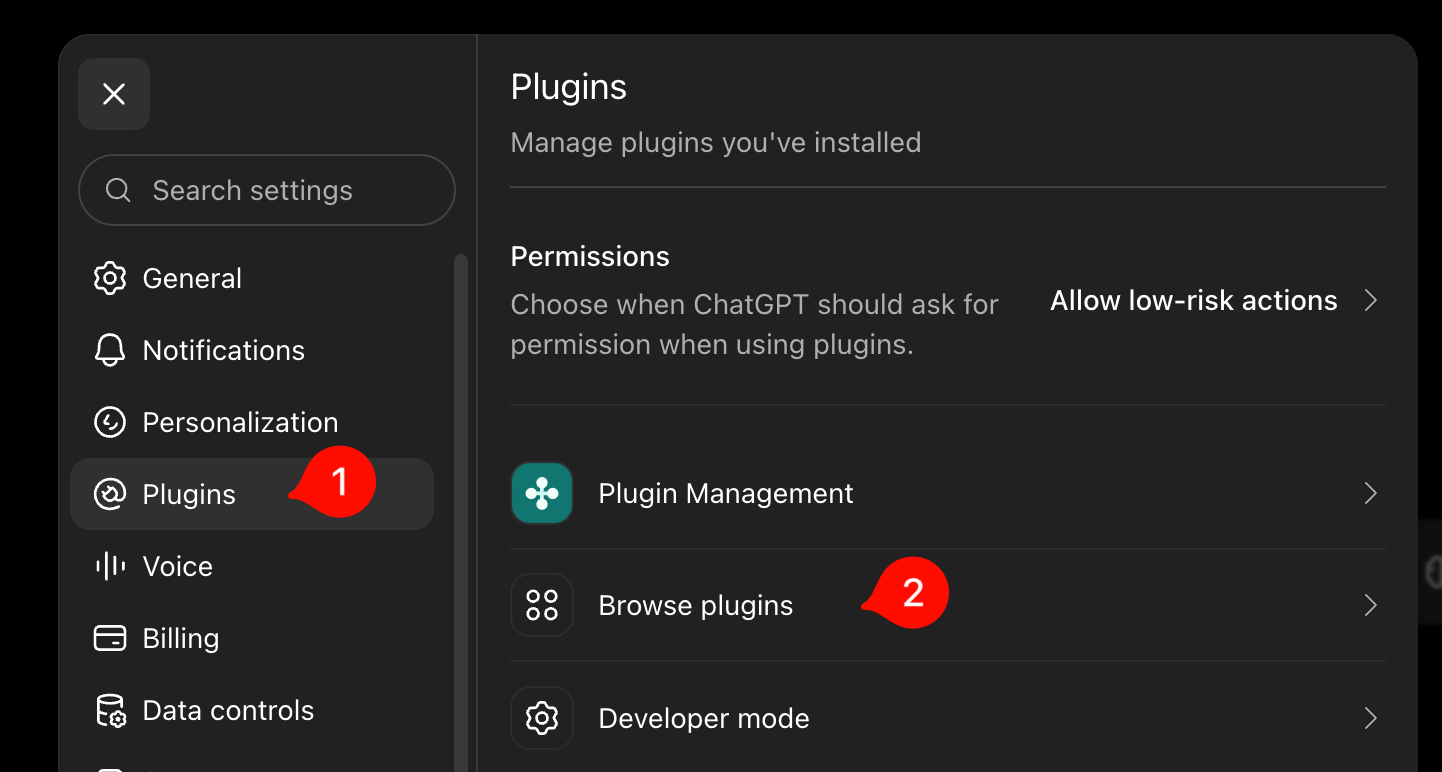
If you don't see Plugins in your settings, or the plugin browser offers no way to add your own, enable Developer mode first — it lives on the same Plugins settings page. OpenAI is still rolling these menus out, so naming can vary slightly; anything called Connectors works the same way.
Step 3 — Create the UHT plugin
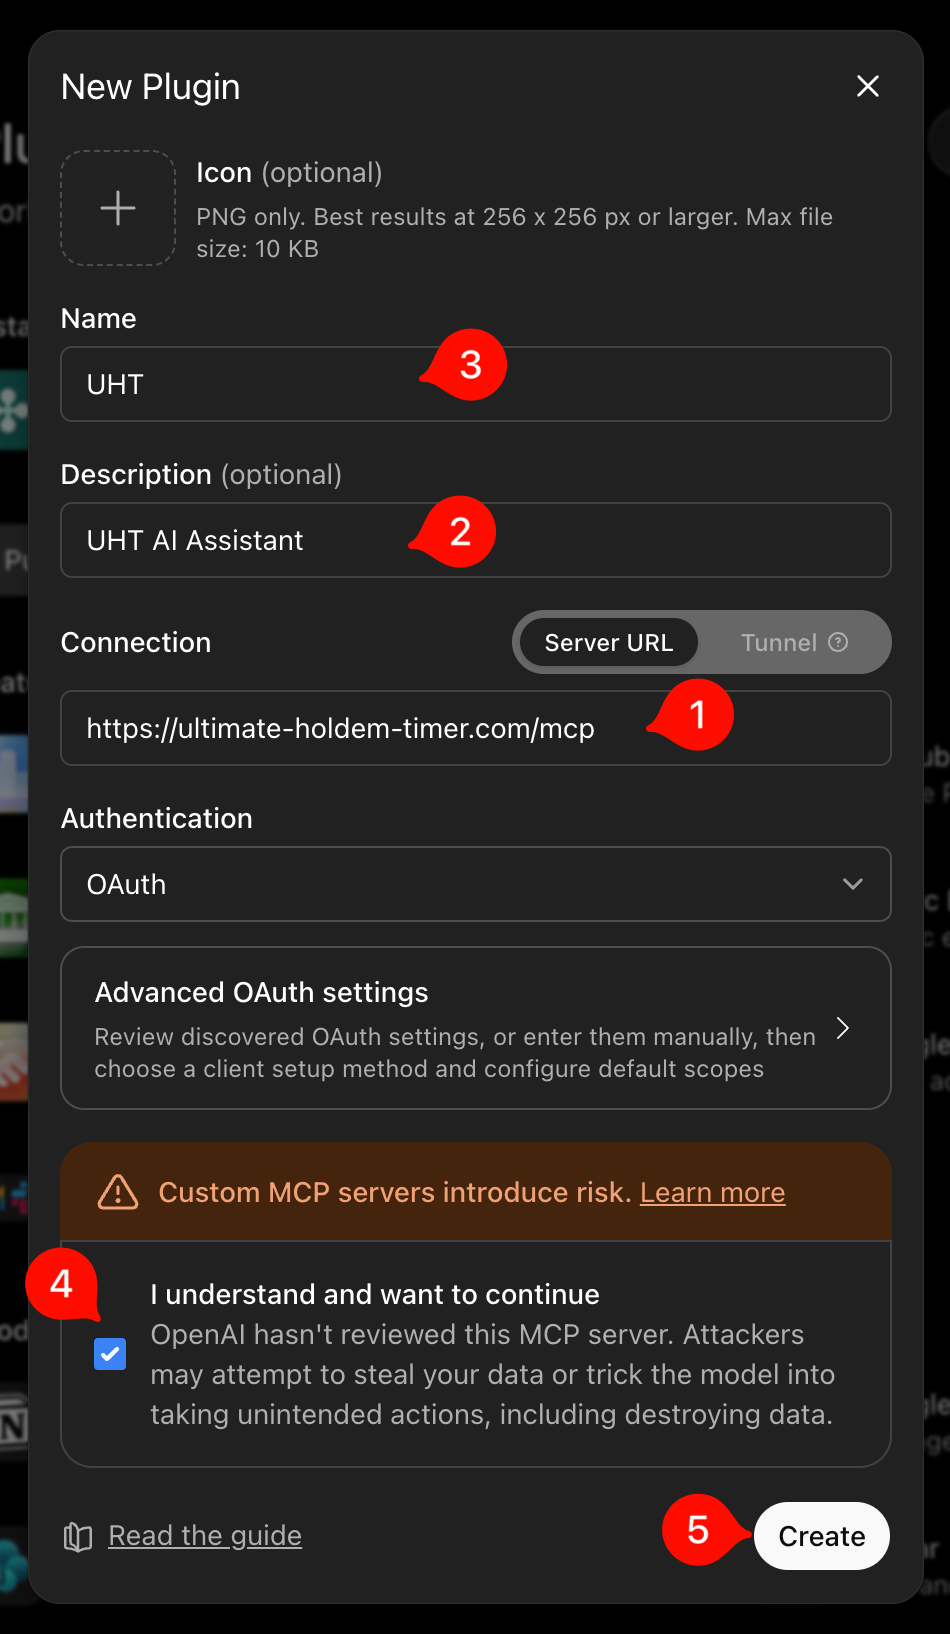
In the plugin browser, choose to create a new plugin. The New Plugin dialog opens — fill it in like this:
- Connection (1) — leave Server URL selected and paste
https://ultimate-holdem-timer.com/mcp. - Description (2) — optional; something like
UHT AI Assistanthelps you recognise it later. - Name (3) —
UHT. This is the name you'll pick from the chat menu afterwards. - Leave Authentication on OAuth — ChatGPT discovers everything else automatically, so you can ignore the advanced settings.
- Tick I understand and want to continue (4). ChatGPT shows this warning for every server that isn't in its own directory — it simply hasn't reviewed UHT itself.
- Click Create (5).
Step 4 — Start the sign-in
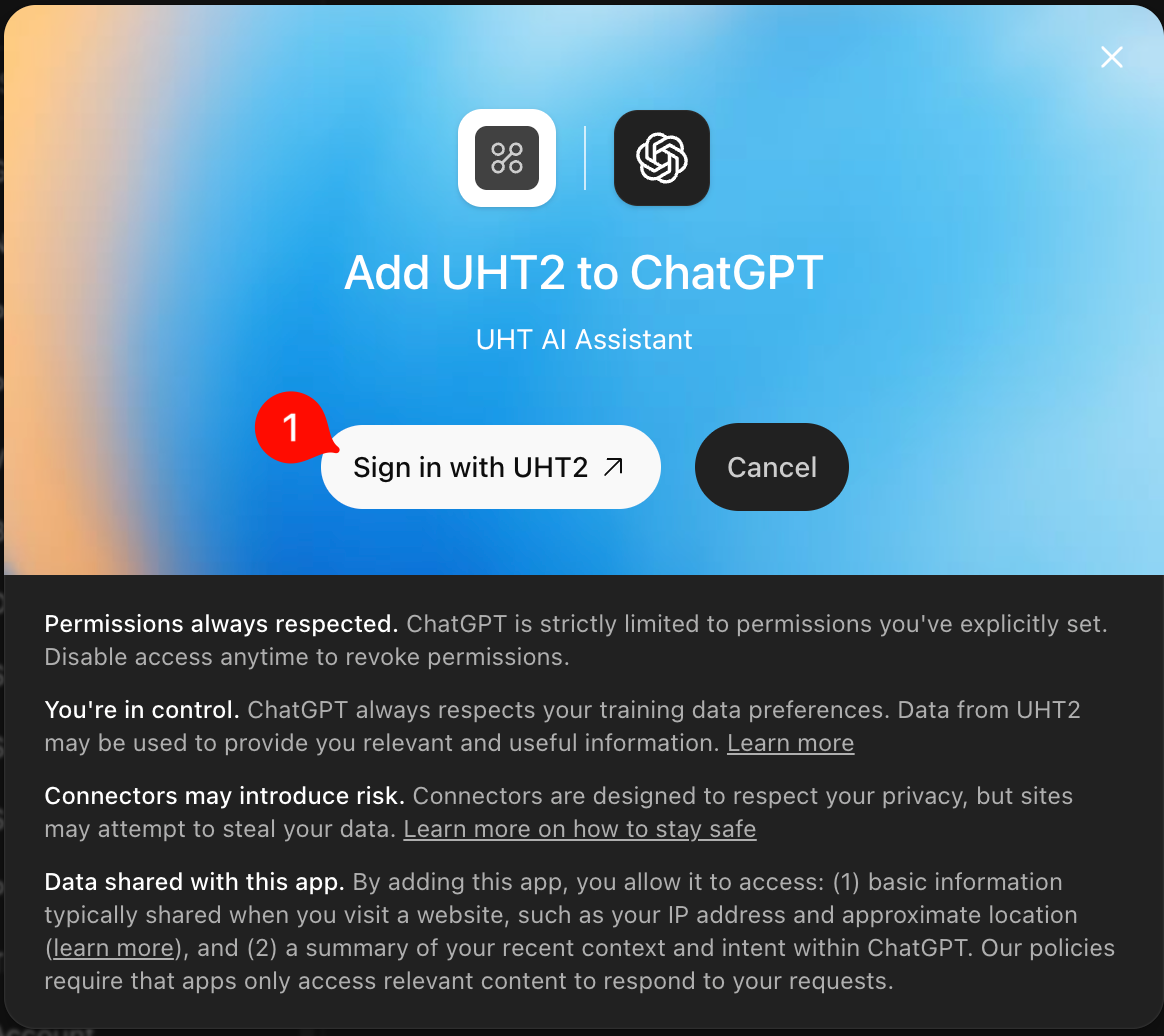
ChatGPT now asks to add UHT and explains what data is shared. Click Sign in with UHT (1) — this hands you over to UHT itself, where the actual authorization happens.
Step 5 — Authorize on the UHT consent page
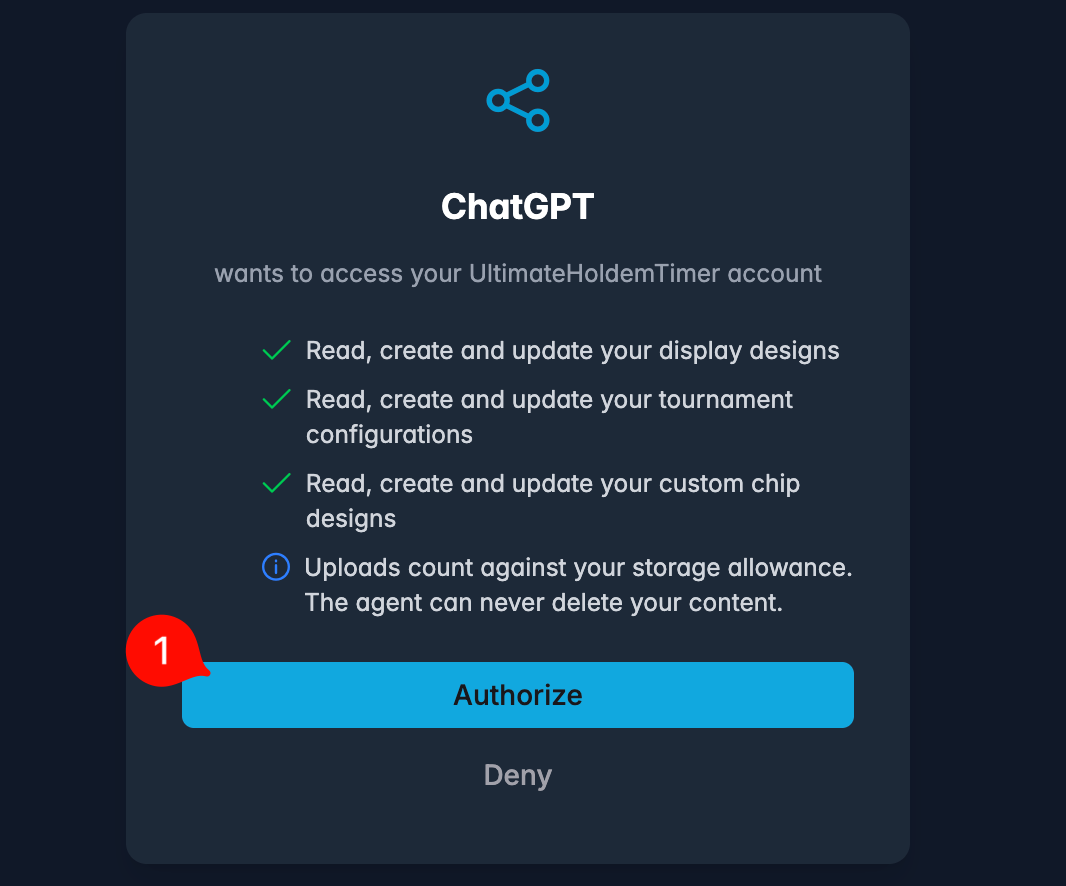
Your browser lands on the UHT consent page. If you're not signed in to UHT yet, you sign in first and come right back here. The page lists exactly what ChatGPT will be able to do — read, create and update your display designs, tournament configurations and chip designs, and never delete anything. Click Authorize (1).
Step 6 — Check the connection
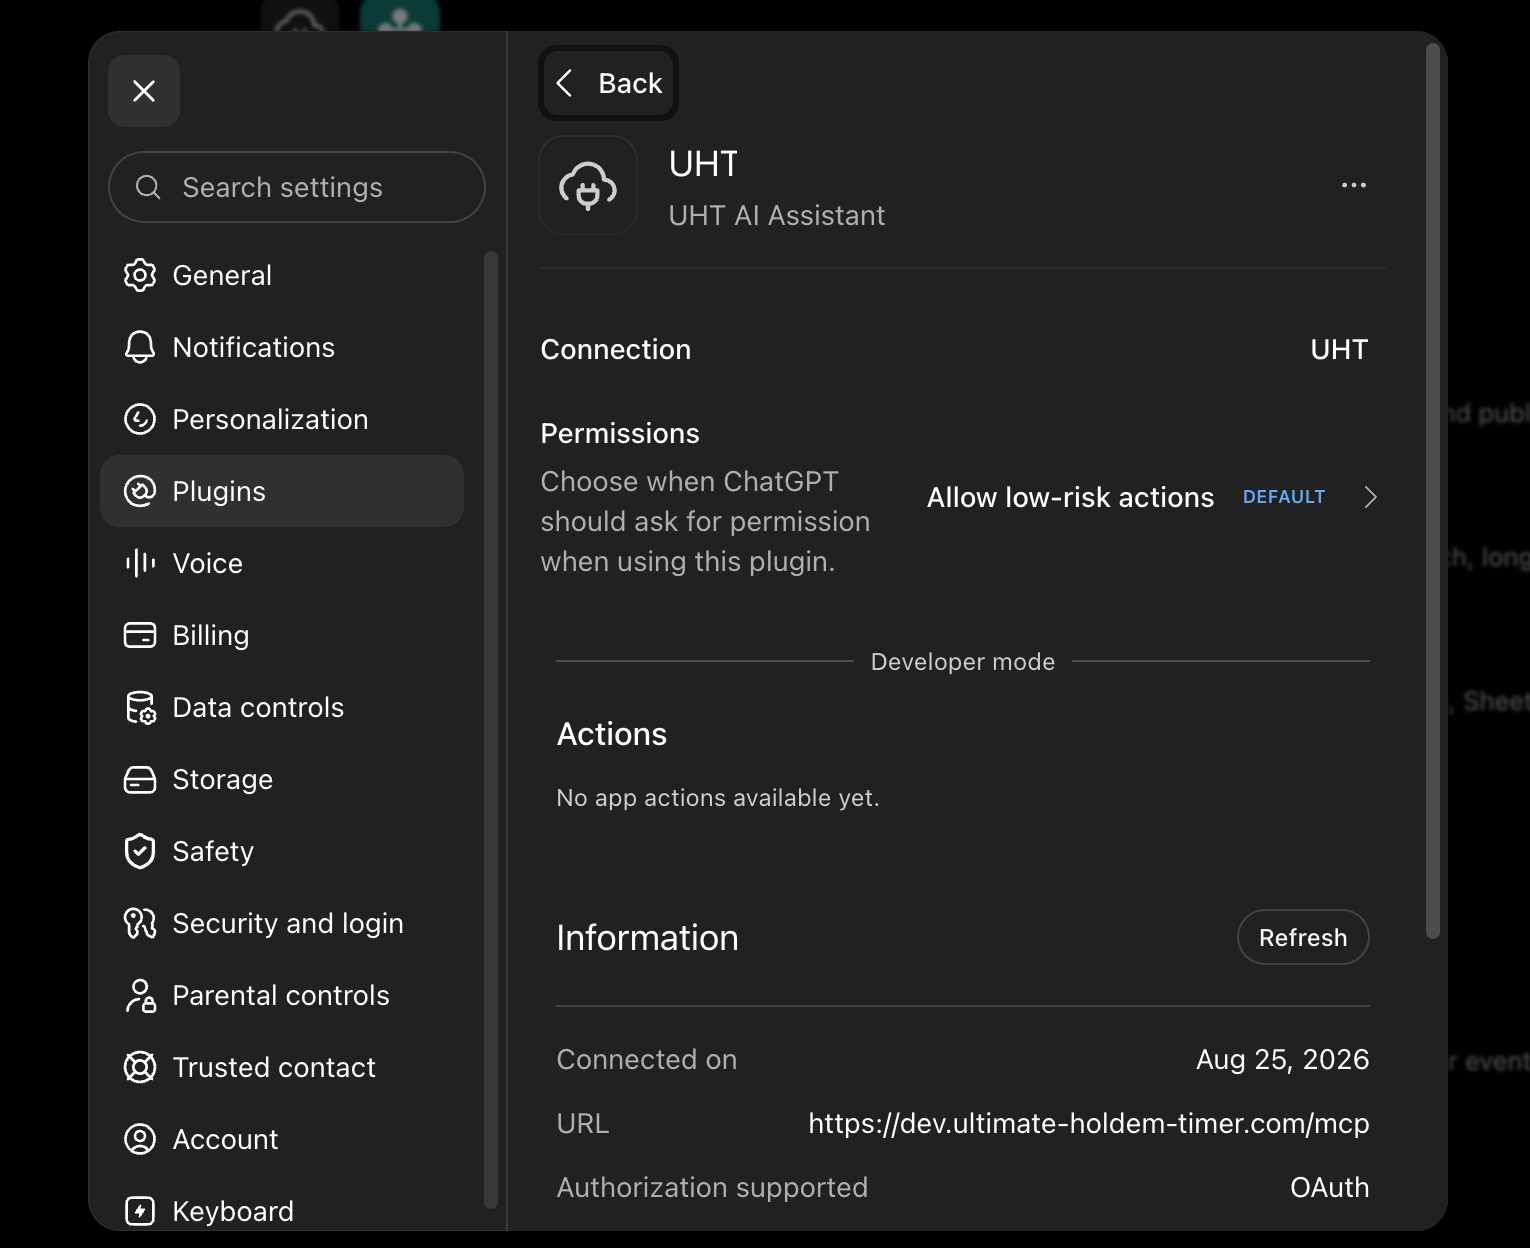
Back in Settings → Plugins, the UHT plugin now has its own page showing the connection details — when it was connected, the server URL and OAuth as the authorization method. Seeing this page means everything worked.
Step 7 — Use it in a chat
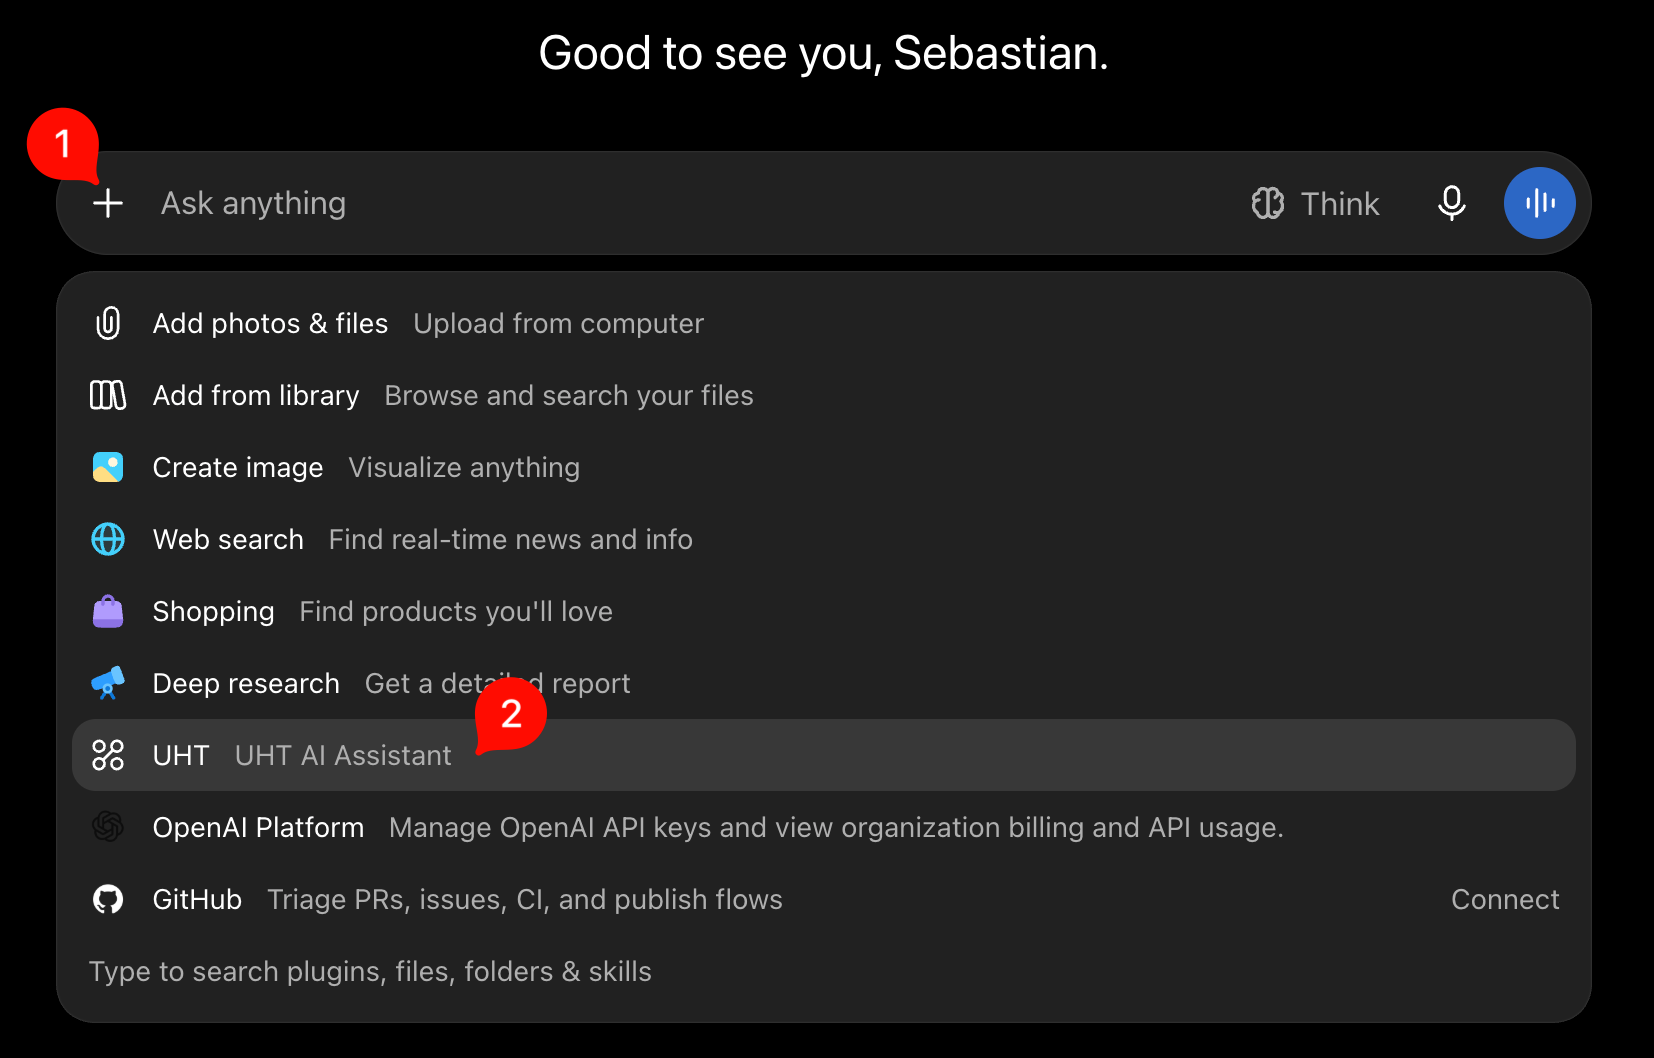
In any chat, click the + button in the message box (1) and pick UHT from the list (2). Then just ask — for example:
Use the UHT tools to show my account info and list my display designs.
The example prompts page has ready-made prompts for display designs, tournament configurations and chip designs.
If something doesn't work
ChatGPT says the connection failed or is unauthorized — the access token lasts about 30 days. Open the plugin in Settings → Plugins and reconnect; you'll run through steps 4–5 again and everything resumes.
The consent page says you're not eligible — the MCP server is temporarily disabled or currently requires a higher account tier. The landing page always shows the current conditions.
UHT doesn't appear in the + menu — check Settings → Plugins that the plugin exists and is connected (step 6). If it's missing entirely, create it again from step 3.
More general answers live on the Connect your agent page.